DIY jewelry

DIY Boho Turquoise Earrings

I love turquoise whether it’s the real stuff (used in this DIY) or dyed Howlite and Magnesite. Turquoise is a very versatile stone that is complimented by any metal tone. I especially love pairing turquoise with copper. There is just something about the way it looks that is just amazing. And when you mix metals together with turquoise, you get something truly special.

Turquoise Drop Earrings 7

In today’s DIY, we will be making the beautiful pair of earrings above. Below is a complete tool list and material list so you can make your very own lovely pair. Feel free to switch the stone out of a crystal and change the metal to suit your individual tastes.  I’m sure this will look amazing using a rich blue crystal and gold toned wires…..I may have to make a pair like that myself.

Tools and Materials

Materials:
22 Gauge Copper Wire (any temper is fine)
2 – 10x14mm Matching Turquoise Stone Flat Tear Drops (or drop bead of choice)
4 – 6mm Silver Plated Pewter Spacer Beads
2 – 6mm Oxidized Brass Spacer Beads
2 Copper Ear Wires

Tools:
Flush Cutters
Chain Nose/Flat Nose Pliers
Round Nose Pliers

So, go grab your coffee, supplies and tools and let’s get started.

Instructions:


Drops Slip on Wire
Cut two pieces of wire about 4 to 5 inches each.  Thread a briolette on to the wire and center the stone.

Press the ends of the wires together using chain nose/flat nose pliers pinch the wires together until they run parallel to each other and sit

Drop With Pinched Wire

snuggly above the stone. It’s okay if the wires aren’t exactly side by side and cross just a bit. If for some reason your notice wires are not exactly the same length, don’t sweat it.  It will work out just fine.


Washers Added


Slide on a silver spacer, a brass spacer and a silver spacer.


Wraps

If you happen to have a wire that is shorter than the other, wrap around the longer wire two to three times. If not, just pick a wire. Trim the piece of wrapping wire as flush to the wraps as possible.

Wrapped Loop


Using round nose pliers create a wrapped loop. Trim access wire.  If you need help creating a wrapped loop, click here.

Open the loop at the bottom of your ear wire and attach to the wrapped loop. Close the loop. Repeat for second earring.

I hope you enjoy this tutorial and will post pictures of your creations in the comments (if it will let you).  Until next time, stay caffeinated my peeps!

Turquoise Drop Earrings 1

DIY jewelry

DIY: Dangly Pearl Earrings

I love long, dangly earrings, and they are on trend like almost always. They are elegant and create the look of a longer, sleeker neck. Longer thin earrings can also an elegant look to any outfit.

Earrings Finished 1

I also love unique findings and beads.

Screen Shot 2018-04-29 at 8.06.04 PM

Last week, I told you about coming across some awesome beads on the Halcraft website.  I purchased two beautiful mother of pearl beads that have little, tiny pave frames. So cute!

About a month ago, I came across some unique ear threader style ear wires on clearance at Hobby Lobby.

So lets grab our tools, supplies and coffee so we can get started.

Materials:Supplies
1 pr – Ear Threader findings
2 pc – Mother Of Pearl Shell Bead with Micropave Frame
2 pc – Head pins

Tools:
Round Nose Pliers
Chain Nose or Flat Nose Pliers
Wire Cutters

Instructions:
Slide a bead on a head pin and form a loop using round nose pliers. Repeat for second bead.

Close up of stone dangles

Attach the bead dangles to the bottom loop of the ear threader.  Easy peasy, lemon squeezy! (I strongly suggest opening the loop at the top of the bead and not the loop of the threader just to make sure it doesn’t break.)

Finished Earrings Close up of stone

Enjoy your new earrings. Until next time….stay caffeinated, my peeps.

Finished Earrings 2

DIY jewelry

DIY: Stretch Bracelet Stack

Stacking bracelets are everywhere in the Bohemian jewelry trend. They are super stylish and easy to wear. I love stacking, mixing and matching. You can mix these chunky beaded stretch bracelets with chain bracelets too for a super trendy look. They are also a way to use up extra beads.

Finished Bracelets 1

I came across some very pretty beads the other day from Halcraft Collection.  (This is the company that supplies Michael’s Craft Stores with the Bead Gallery bead strands.) I purchased directly from the site Amazonite, Mahogony Obsidian, Costa Rican Rosewood, Painted Design Dyed Agate, and some Mother of Pearl beads with Micropave Frame.  Guys, do yourself a favor and cut out the middle man (Michael’s) and purchase directly from Halcraft.  They have super awesome customer service and superior pricing.

Anyway…..back to the DIY. Go grab your tools, supplies, and a cup of coffee.

Supplies - braceletsMaterials:
Costa Rican Rosewood Oval 10x13mm
Multi-pack – Amazonite Round Stone Beads
Mahogany Obsidian Round – 6MM
Painted Design Green Dyed Agate Tube
Stretch Cord (I used Bead Smith’s Opelon Stretch Jewelry Fiber)

NOTE: Your bead quantities will vary based on bracelet size and pattern.

Tools:
Scissors
Glue
Tape Measure
Beadalon’s Elastic Cord Needle (Optional, but so amazing.)

Instructions:
Measure your wrist and add 1/2 to 1 inch to the measurement depending on how you want your bracelet to fit (6.5″ wrist should be 7″ or a 7.5″). Add an additional two to three inches to that measurement and cut that length of cording. This will ensure you have enough cord to knot.  You will be making a total of 5 bracelets so cut that many pieces of cord.

Pattern Layout


Lay out your pattern the length of your measurement plus the additional 1/2 to 1 inch. If you are using the needle, you can slide your pattern on the needle. I really recommend the needle.  It makes stringing stretch bracelets extremely easy.


If using the needle, catch the cording under the hook at the end and slide your beads onto the cording being careful not the slide them off the far end of the cord.


Tying the Knot


Once all of your beads are on your cord, tie an overhand knot and add a drop of glue over the knot.


Hiding the Knot


Pull the cord tight and slide a bead over the knot. Allow the glue to dry completely. Trim off tail.


Repeat all steps for the remaining bracelets.


Stack them babies up and wear them with pride!  Until next time….stay caffeinated my peeps!

Finished Bracelets 2


DIY jewelry

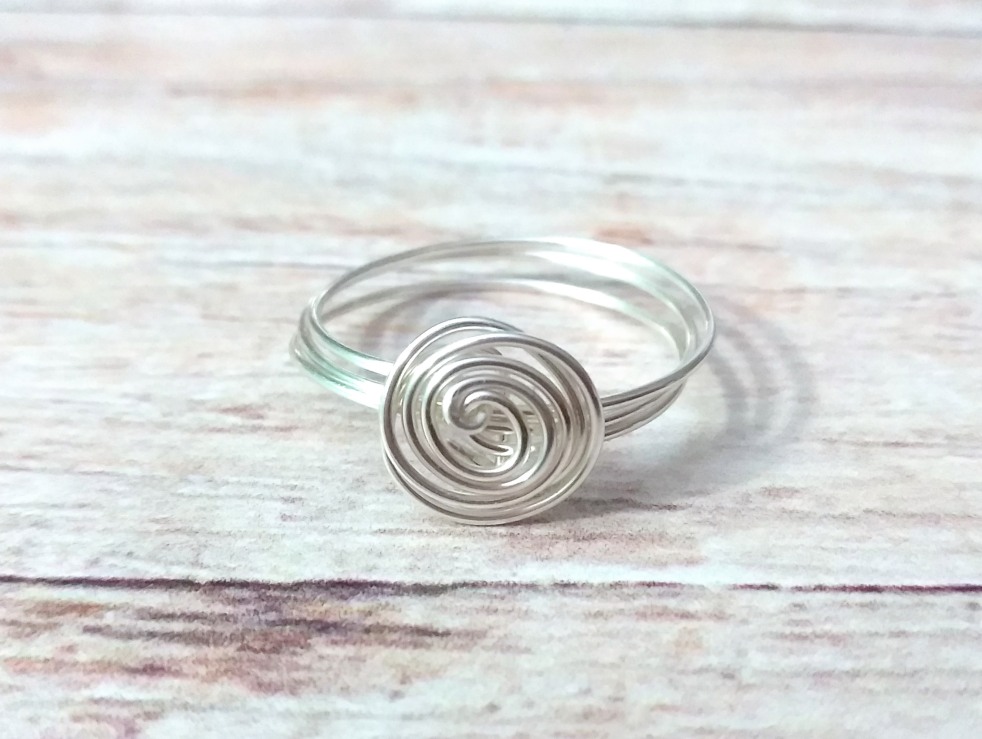
DIY Super Quick Wire Spiral Ring

For today’s Tuesday Tutorial, I have come up with this super quick and stylish wire spiral ring. This ring makes in under 10 minutes and is great for those wanting to start into making wire jewelry.  It’s trendy and very petite. These little rings are very pretty made in colored wire as well. So grab your coffee and safety glasses, and let’s get started.

Finished On
I used 22 gauge Artbeads® Designer Wire in Silver Non-Tarnish for this project. This is a very soft wire and is easily manipulated.  If you want a stiffer wire, choose a half-hard variety of wire such as Beadalon® German Style Wire.

supplies.jpg


Tools:
Chain Nose Pliers
Wire Cutters
Ring Mandrel
Safety Glasses


Instructions:
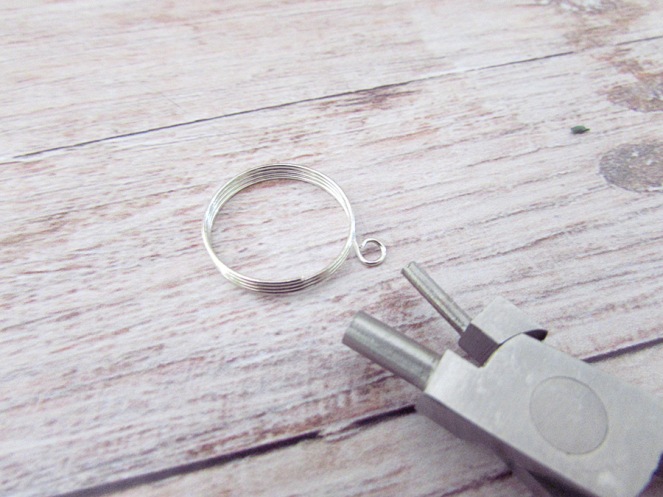
Cut and straighten around 12 inches (30.48 cm) of wire. Wrap the wire three times around the ring mandrel at the mark of your desired size.

Wrapping on Mandrel

Cross the ends and give a slight twist to tighten. You may find it easier to take the ring off the mandrel before moving to the next step if you are uncomfortable working on a mandrel.  Bring the ends around to where they are going in the same direction, and begin spiraling your wire around.

Leave yourself a slight tail of about a 1/4 inch (0.635 cm). Slide the ring off the mandrel. Using your chain nose pliers, fold the tails beneath and into the spiral. Press firmly so that the ends stay.


Wear your ring with pride, and stay caffeinated my peeps!  See you next Tuesday!


DIY jewelry

DIY: Whimsical Memory Wire Ring

Today, I am showing you how to make a adorable beaded memory wire ring using a charm made with Swarovski® Crystals from Cousin Corporation of America available exclusively from Michael’s Craft Stores.  This bumble bee charm ring is so adorable.

This ring is fun and easy to make, and it will become your favorite go to ring in no time. It is also a great memory wire beginner’s project.

When I first saw this charm, I thought this little guy was a firefly. Either way, he is still super cute.  One word of warning: if you are going to be doing a lot of clapping, I suggest taking the ring off first.  I had a bruise on my knuckle.  OUCH!
Bumble Bee Ring 1
Supplies:
Ring Sized Memory Wire (I used Beadalon® brand.)
11/0 Seed Beads (Yeah….tiny ones)
1 Sunshine Bumble Bee Charm (or charm of choice)Tools:
Memory Wire Cutters (USE THESE AND NOT YOUR REGULAR CUTTERS!!!!)
Memory Wire Finishing Pliers (I HIGHLY recommend these over round nose for this project)Instructions:
Separate three to four rounds of memory wire and cut in line with the end of the wire.  Using the smallest part of the Memory Wire Finishing Pliers, form a loop at one of the ends of the memory wire.

Bumble Bee Ring 2
Bead your wire in any pattern or solid color of your choice.  I used TOHO Galvanized Silver,  Starlight Galvanized Gold and Hematite for my Bee ring. Bead up until you have about a 1/4 of an inch of wire left and form your end loop the same as you did your beginning loop.

Bumble Bee Ring 3

Attach your charm with the clip onto either one or both of the loops.  If you want a more adjustable ring, clip the charm on only one of the loops.

Bumble Bee Ring 4

This ring is easily customized to suit your tastes. Simply pick your charm and bead combo.
Bumble Bee Ring Variations
Enjoy your new fun ring, and stay caffeinated!