Reviews

Bead Treasures Regal Rulla Review

Today is a bit different.  Normally I do a tutorial on Tuesdays, but today I am doing a review of this really nice beading kit I purchased at Hobby Lobby on clearance for $5.  The normal price for this kit is $19.99.

Review 3

So for $5, I decided it was well worth it.

The kit comes with almost every thing you need:


  • Instructions
  • 3.5g (30) Rulla beads in “Crystal Violet Rainbow”
  • 0.5g Miyuki® size 11/0 seed beads in “Matte Metallic Patina Iris”
  • 2g Miyuki® size 11/0 seed beads in “Light Gold”
  • 16g Miyuki® size 8/0 seed beads in “Metallic Forest Green Iris”
  • 7.5 Matubo™ size 6 beads in “Bronze Pale Gold”
  • 2 – 4mm closed gold tone jump rings
  • 2 – 6mm open gold tone jump rings
  • 1 – 12mm gold tone lobster claw clasp

Okay…let’s get to the review.

The kit is labeled “Advanced Beginner” ages 14+. It says that it makes a pendant with a necklace of up to 22″ long.  I feel it is appropriately labeled.  It should take about an hour or just over depending on your skill level. There is actually enough beads to make it a bit longer if you need to. It’s not a bad kit.  The quality of the beads is nice.  There are some flaws in the beads though.  So make sure you either do not use those beads or turn them so the flaw will not be seen from the front of the pendant. So if you are ready to try your hand at some bead stitching, then I recommend finding these kits and see if they are on clearance too.

The package is easy to open and could easily be recycled for bead storage.

The cons of this kit are: There are a few things that really could be improved here

  • No needle
  • No thread
  • Instructions are just a bit unclear and not enough pictures. I am a very visual learner and seeing pictures would be better than very unclear language.
  • Some of the beads are flawed and misshapen causing the finished piece to be a bit off.
  • Recommends using thread for the necklace. I do not like this as thread can easily break. I ended up using Beadalon® 19 strand stringing wire which gave the same soft drape of thread but the security of a wire.
  • The style of the necklace is not all that pretty.  The pendant is gorgeous, but the pattern they recommend for the necklace detracts from the beauty of the pendant.  I suggest either using a slender chain or a different pattern for the necklace.

The pros of this kit are:

  • All the beads you need are plus extras.
  • Color coordinated beads which are beautiful.
  • Not a hard project to complete within about an hour or so depending on your skill level.
  • Retail price is normally $20 which really isn’t a bad price if you are planning on selling the finished piece. You could probably sell this for a low break-even price of $35 if you count your hourly rate as $15 an hour. I think you may be able to get more for it because it is very beautiful and unusual.
  • The pendant is GORGEOUS!

Royal Sunset Necklace 2

All in all, I think this was a great purchase especially since it was only $5!  Would I purchase one of Hobby Lobby’s other kits at full-price?  Possibly if they were as easy as this one. If you find this kit and do buy it, here are a few suggestions:

  • Double stitch your base row to secure the piece. It can be a bit floppy as you work.
  • Keep your tension tight, but do not over pull.
  • Take your time and read the instructions before you begin so you can familiarize yourself with the technique used.
  • Use Fireline® in Smoke so the thread is not visible.
  • Coat your thread with a thread conditioner.  Yes, I know you could get away with not using this, but it really makes a difference as to how the thread slides through the beads.
  • Either use a chain for your pendant or a different pattern for the beaded necklace.
  • Use stringing wire for the necklace if you use beads and not thread.

Royal Sunset Necklace 5

Overall, I really liked this kit. It was easy to figure out even though the instructions seemed a bit oddly worded for me.  But then again, I am a very visual person and reading instructions and being able to follow them doesn’t come easy for me. Watching someone or looking at very clear diagrams and pictures is easier for me.  I ended up buying two of these kits. Between the two with the extra beads, I may be able to get a third necklace out of it.  GO ME!  Until next time, stay caffeinated my Peeps!

DIY jewelry

DIY: Swarovski Crystal Bangle Bracelet

Are you ready for a lovely and very simple Swarovski crystal bangle bracelet?

Finished 2

This bracelet is a redo from a previous bangle I had made last year for Cousin Corporation of America when they rolled out their Swarovski crystal collection for A.C. Moore.  This same crystal collection is available at Michael’s Craft Stores.  This time instead of using the delicate pinks and round silver beads, I am using the Light Gray Xilion Pearl Combo pack and a few swirly bead caps.

Let’s grab our supplies, tools, and coffee so we can get right to it….

Supplies

Materials:
1 Pack – Swarovski Create Your Style Xilion Pearl Combo in Light Gray
2 – 3 inch long curved noodle beads
4 – 6mm bead caps of your choice
2 – #2 crimp tube
2 – Crimp Covers (Optional)
2 – 4mm jump ring
1 – 8mm jump ring
Clasp
Beading Wire

Tools:
Crimping Pliers
Chain Nose or Flat Nose Pliers
Wire Cutters
Measuring Tape

Instructions:
Measure your wrist and cut about five inches more of beading wire than your measurement.

Jump Rings


Attach a 4mm jump ring to the 8mm jump ring creating a coupling and set it aside.

Clasp


Attach a 4mm jump ring to the clasp. String a crimp tube on to the beading wire, and pass the wire through the 4mm jump ring. Crimp the tube. Cover the crimp with a cover using chain nose pliers. Trim off extra wire.


Stringing It

Thread on the following: a 4mm crystal, 6mm crystal pearl, a bead cap, noodle bead, bead cap, 6mm crystal pearl, 4mm crystal, 4mm pearl, 4mm crystal, 6mm pearl, 4mm crystal, 4mm pearl, 4mm crystal, 6mm pearl, bead cap, noodle bead, cap, 6mm pearl, 4mm crystal, a crimp tube and the 4mm jump ring of the jump ring coupling.

Finishing It

Crimp the tube and cover with a crimp cover. Trim excess wire.

You now have an elegant bracelet you can wear for any occasion.

Enjoy your new bracelet.  Until next time, stay caffeinated my peeps!

Finished 3

DIY jewelry

DIY: Valentine’s Earrings

Okay….I know, I know….it’s Wednesday. It has been some time since I have posted a tutorial.  With Holidays and sick children and being sick myself, blogging just wasn’t a priority.  Sorry.

Anywho….today I have for you an easy Valentine earring tutorial just in time for your night out with your favorite Valentine.  These earrings are also perfect for weddings, a Mother of the Bride gift, or Bridesmaid gifts. Or you could just keep them for yourself.  🙂

Finished 3

The particular materials I have used in this DIY were some I had on hand and may not be available is some areas.  All the metal components I have used are Sterling Silver. Right now, I have only seen the heart connectors in Platinum plate. They are put out by Cousin Corporation of America under the name Elegance Metals. I have not found the Metallic Rose Matte dagger beads anywhere since ordering them online almost three years ago. The site I ordered from is now out of business; however, your local mom & pop bead store will more than likely have something very similar and in similar colors.

Materials:
2 – Filigree Heart Connectors
2 – 3mm Jump Rings
2 – 6 mm Jump Rings
2 – Czech Glass Dagger Beads (your choice of color)
2 – Ear Wires
2 – Swarovski crystal flat backs in matching color (Optional)
Glue (Optional)

Tools


Tools:
Chain Nose or Flat Nose Pliers

I personally use two pair of pliers for opening and closing jump rings. Saves your nails.


Instructions:

DaggersOpen one of the 6 mm jump rings and thread it through the hole of a dagger bead, and close the ring.

Attach a 3 mm jump ring to the bottom of the heart connector and to the dagger bead.  Attach the ear wire to the top loop of the connector.  Repeat for second earring.


Without Bing


You can leave these as is or take the additional step to bling these up a bit. Apply glue to the back of the flat back crystal and press firmly against the heart. Allow 24 hours to fully dry.


Finished 1

Coffee Life

Keto Coffee Review

I was able to try something new this week in the midst of having a child getting a tonsillectomy (how fun). I came across a Facebook post from a lady I follow, Grassfed Mama. She was giving away samples if we would cover shipping and handling.  No biggie, I could totally do that.

Well, this stuff is supposed to be really good for you and great for those wanting to lose weight.

Here is some info on the Keto Coffee from the It Works site:

The very first of it’s kind, It Works Keto Coffee gives you an instant coffee that will aide your efforts to get into ketosis, fast!

Fuel your body and brain with It Works! Keto Coffee powered by KetoWorks™! With Grass-Fed Butter and Medium Chain Triglycerides (MCTs), this instant keto coffee helps to increase your body’s ketone production to rapidly breakdown fat, boost your energy, and sharpen your focus!†

  • Builds and restores vital proteins through essential amino acids and collagen peptides†
  • Contains fatty acids from Grass-Fed Butter and Medium Chain Triglycerides (MCTs)†
  • Boosts and sustains your energy output to burn more fat†
  • Sharpens mental focus and enhances mood†
  • Kills cravings and satisfies hunger†
  • Fuels your body and brain through increased ketone production†
  • Supports the results of your low-carb, ketogenic diet†
  • Gives you instant energy and focus on-the-go with easy, single-serving packets†

Screen Shot 2017-11-17 at 7.55.33 AM

It Works! Keto Coffee’s unique fatty acids from Grass- Fed Butter and Medium Chain Triglycerides (MCTs) help to increase your body’s ketone production and the process of ketosis, including helping to boost and sustain your energy output, sharpen mental focus, and enhance your mood.† By following a ketogenic diet that is low in carbohydrates, high in fat, and with moderate protein intake while using It Works! Keto Coffee, you will experience the full fat-burning effects of ketosis in your body.†


You can read all their FAQ here.

Okay…..what I love about it:

  • It’s an instant coffee which makes it extremely easy and convenient, especially when traveling.
  • Single serve packaging also making it easy to travel with.
  • Filled with awesome stuff!  (See the label above.)
  • It’s non GMO and Soy-Free.
  • It’s made in the US.
  • IT HAS BUTTER IN IT!  Yes, Butter!  Butter is actually good for you, look it up.

Downside…every thing has a down side:

  • Taste.  Taste is really huge to me! It has a rather strange taste.  I ended up adding in Stevia to give it a sweeter taste, but it really didn’t help.
  • Price.  This coffee will cost you $39 for a package of 15 pouches. That’s only 15 cups.  Now if you are already spending that much on single serve coffee from a coffee house, then the price is not all that bad.
  • It’s thick.  Now, I don’t mind a thick coffee drink, but this was the consistency of sludge.

To sum up, I was slightly disappointed in this product mainly because of the taste and secondly by the price. I have found much better tasting Keto coffee recipes on Pinterest that you may want to try.  Once you have all the ingredients to make your own, the price per cup is very small compared to this.  Will it have their “proprietary thermogentic blend” of stuff? No. Does that matter? NO.

You may like this stuff, but I didn’t.  Please do not allow my opinion to keep you from trying it.  It just wasn’t my cup of coffee.  The one good thing was I only had the Keto Coffee this morning and not an entire pot as usual. So that could possibly be a plus. Until next time, stay caffeinated my peeps!

DIY jewelry

Embellished Wire Spiral Hoop Earrings

Last week I showed you how to make some real simple wire hoop earrings.  Today, I will show you how to wire wrap little crystals to the spiral hoop to add some bling to your ring.

Finished Earrings 2

Supplies:
Hoops from previous tutorial
28 3mm crystals
24 gauge half-hard wire

Supplies

If you are wondering why I used 24 gauge half-hard wire here, I like the tightness it gives to the wraps.  You may find it easier to work with dead soft wire instead.

Tools:
Wire Cutters
Flat Nose or Crimping Pliers

Instructions:
Cut a length of 24 gauge wire that you are comfortable working with.  I use a rather long piece so I can make work earrings without having to cut more wire.

Make a tiny bend in your 24 gauge wire giving yourself about a 6 inch tail. This will be your wrapping wire. Slide the bend along the top of the spiral hoop until you aBeginning wrapsre about 2 inches from the end of the spiral. Using the tail, wrap the smaller gauge wire five to six times around. Leave the end for now.  We will trim it later. If your wire is loose and sliding, give it a squeeze with flat nose pliers of use crimping pliers. I personally like using the crimping pliers as it will not squish the wraps.


Slide a crystal on to your wrapping wire, hold against the spiral, then wrap around the spiral three to four times. Repeat for the next crystal. Make sure you use the same amount of wraps between each crystal.


Continue down until you have placed the last crystal on.  Wrap the end around five to six times. Push the wrapping wire around and trim the end off towards the front of the spiral away from where it would be in the ear.

Trim the wrapping wire tail from the beginning at the front of the spiral away from where the spiral will hit in the ear lobe.

If you find that your wraps are too loose and sliding, drop a bit of glue like Hypo-Cement on the beginning and end wraps.

Adjust your spirals back into shape.

Finished Earring

Finished Earrings 1

To wear, simply slip the spiral into the lobe and secure with a nylon stopper. Until next time, stay caffeinated my peeps!

DIY jewelry

Wire Spiral Hoop Earrings

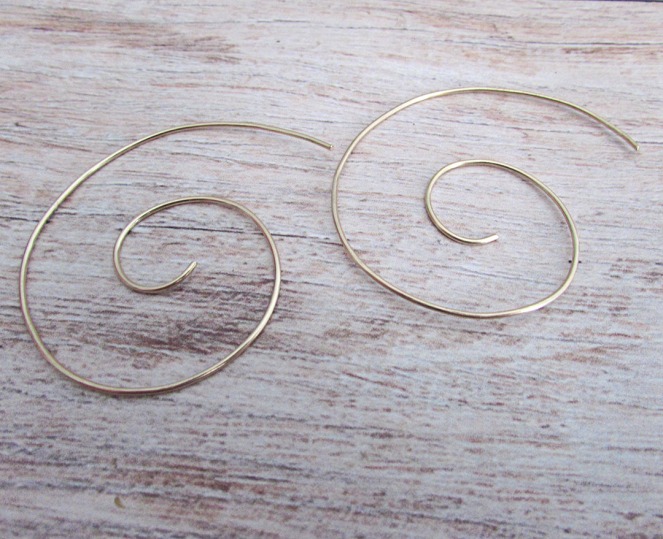
For today’s Tuesday Tutorial, I will be showing you how to make these trendy spiral hoop earrings. They are super easy to make and fun to wear.

Finished Spirals

The lightweight wire makes these beauties easy on the ears for sure.  So lets get to it!  Gather your supplies and tools and meet me back here!


Supplies

Supplies:
18 gauge wire of choice

Tools:
Wire Cutters
Bail making pliers or a Sharpie marker
Cup Burr or a file


Instructions:
Cut two sections of wire about 9 inches each and either use your cup burr or a file to smooth both ends of the wires.

Grasp the end of one of the wires with your bail making pliers or press the wire against your marker barrel and give a slight roll to create a deep hook.

Plier Shot Beginning Spiral

Roll the wire around using your fingers to create a loose spiral. You can also use your pliers to help the curl along if needed.

Finishing the Spiral

Repeat for the second piece of wire. Place the spirals side by side and adjust as needed to make sure they match.

Adjusting Spirals

I polished mine to a high shine using MAAS metal polish and a cotton buffing wheel on my Dremel.  I sealed them with shellac to they wouldn’t turn on me.

These earrings are easy to embellish as well.  You can give them a flattening with a hammer and then dap a bit with a ball peen hammer to give a forged look, or you can wire wrap crystals to the spiral for a bit of bling.

To wear these earrings, simply slip through your lobes as far around as you like. I do recommend using Nylon stoppers on the end after the hoop is in your ear, especially if your lobes are a bit stretched out like mine.

Next week, I will show you how to wire wrap the crystals to your hoops.  Until then, stay caffeinated my peeps!

Coffee Life

A Hidden Gem & A New Coffee Fix

Main Coffee Shot

Okay….You guys know I am on the look out constantly for new coffee to feed my addition.  Turns out I didn’t have to go very far this time.  I found a local coffee distributor within just like four miles or so from me. Apparently this place has been in business since 2010 and I had NEVER heard of it before.  A couple of weekends ago, I saw a post from a fellow coffee addict about an open house at a place in my town called BeanFruit Coffee Company.  Huh?  Never heard of that place. I planned to check it out when I got back into town.   This little hidden gem is nestled in amongst warehouses and car repair businesses in the older part of Pearl, MS just off Hwy 80 East.

I liked their Facebook page so I could keep up with their events so I could be in the loop for next time.

I saw a Facebook post from BeanFruit about an upcoming demonstration.  I marked my calendar as I saw an excuse to go have coffee at a new place.  To my dismay, they are not a coffee shop.  WHAAA!??!?!?  They are a local coffee distributor.

In this little hidden away small space in a warehouse district is an amazing operation run by just a few guys who love all things coffee. Sounds like my tribe! They import from all over the world, roast, grind, and distribute their brand of coffee to local shops and cafés.  How cool is that?!

The motto from their website is:

“Striving for coffee perfection.

Since 2010, we’ve meticulously selected and roasted high quality coffees from across the globe. We believe that a great cup of coffee is not an accident, it’s a process – one that we spend countless hours perfecting.”

Their website also states, “BeanFruit Coffee Company is an award-winning coffee roasting company located in the Jackson, Mississippi metro area.”  Wow….award-winning, and yet I never knew they were even there.  Make sure you check out their story on their site for more details.  You will find a “glossary” of sorts for coffee terminology as well as their mission statement.  Oh, and you can ORDER their coffee too, right off the site. I HIGHLY recommend the Old Route 4 Dark Roast.

I recommend that particular one mainly because that is the one I bought. Why did I settle on that one? It’s a dark roast (my fav) and it had notes of dark chocolate (my favorite chocolate). What better combo than dark chocolate and coffee?! I have found this to be a very smooth tasting coffee for a dark roast as well.  It also makes some really great THM frappas. I really hope they make coffee sample baskets so I can purchase a few and do a giveaway here on the blog for them.

Oh…..the demonstration! The demonstration I attended was about brewing a better cup of coffee at home using the Clever Coffee Dripper method.  I have to say, it was a very informative demonstration.  Paul, the owner of BeanFruit Coffee Company, went into great detail about how temperature, time, and grind effect the outcome of coffee brewing. The demo was extremely informative. He walked us through getting the perfect grind first before moving on to brewing your coffee. I so want one! And the coffee grinder Paul was using too. Some of what he was talking about went over my head, but I’m hoping I retained it.  I was highly caffeinated at the time, so I’m sure it’s up there somewhere.

On hand for the demo was a gentleman from Cascade Beverage Company with some of their amazing cold brew coffees and teas. (There is a demo coming to BeanFruit soon.) The Nutella Latté was out of this world as was the Apple-Pear Cardamon Tea.

Will

I will have to go back and get more coffee soon because I can’t stop drinking BeanFruit coffee!  Gotta have my fix.

When the next event comes around and you are close by, you should totally stop in. Until next time, stay caffeinated my peeps!

Coffee Life

Pleasant Surprises

This is a repost from a previous post. I am moving it to a different page grouping and had to repost it to move it.  Argh…so frustrating as I get used to using this program.

IMG_20170729_125829As you get to know me, you will find out that I am all about Fair Trade coffee companies.  My favorite being Westrock.  However, a lot of Fair Trade coffees are rather pricey unless you can find some on clearance at your local grocery store.  I ran out the other day and had to limp along by grabbing some at Big Lots. Now….I don’t usually use those K-Cup things because they are so bad for the environment, but I was desperate! It was very cheap for 14 single brew cups.  I was completely taken aback with how good this one was. It isn’t bitter or odd tasting like a lot of low cost coffee pods.  It’s a company I had never heard of before, Java Homestead. It is manufactured by Trilliant Food and Nutrition, LLC. out of Wisconsin.  I purchased the French Roast variety with the label stating: “100% Arabica Coffee Dark Roast”.  I really enjoy the flavor of this variety.  It also lends itself well to blended coffee drinks such as Trim Healthy Mama Trimmaccino.
I cannot find out a lot about this company to know their harvesting practices. But if you need some good coffee in a pinch and don’t mind the plastic mess in a landfill, then this is a great pick.

Stay caffeinated, my peeps!

DIY jewelry

DIY Super Quick Wire Spiral Ring

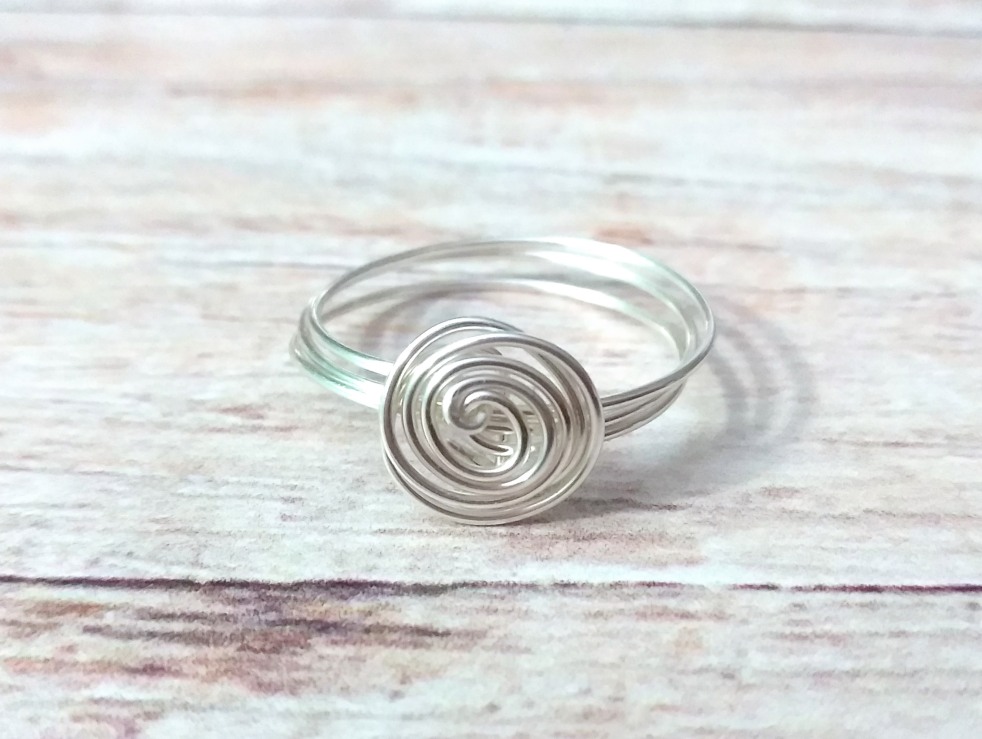
For today’s Tuesday Tutorial, I have come up with this super quick and stylish wire spiral ring. This ring makes in under 10 minutes and is great for those wanting to start into making wire jewelry.  It’s trendy and very petite. These little rings are very pretty made in colored wire as well. So grab your coffee and safety glasses, and let’s get started.

Finished On
I used 22 gauge Artbeads® Designer Wire in Silver Non-Tarnish for this project. This is a very soft wire and is easily manipulated.  If you want a stiffer wire, choose a half-hard variety of wire such as Beadalon® German Style Wire.

supplies.jpg


Tools:
Chain Nose Pliers
Wire Cutters
Ring Mandrel
Safety Glasses


Instructions:
Cut and straighten around 12 inches (30.48 cm) of wire. Wrap the wire three times around the ring mandrel at the mark of your desired size.

Wrapping on Mandrel

Cross the ends and give a slight twist to tighten. You may find it easier to take the ring off the mandrel before moving to the next step if you are uncomfortable working on a mandrel.  Bring the ends around to where they are going in the same direction, and begin spiraling your wire around.

Leave yourself a slight tail of about a 1/4 inch (0.635 cm). Slide the ring off the mandrel. Using your chain nose pliers, fold the tails beneath and into the spiral. Press firmly so that the ends stay.


Wear your ring with pride, and stay caffeinated my peeps!  See you next Tuesday!


Coffee Life

Caramel Mocha Baby Frap – THM FP

I’m always looking for an excuse to slip coffee into my shakes and smoothies. Yes, I love coffee that much!  I came up with this little recipe today. If you follow Trim Healthy Mama, this falls into a Fuel Pull.  It’s small size makes it great as a partner to either your breakfast, mid-morning snack or even lunch.

21248323_10208001911205097_5286609664442654668_o

Caramel Mocha Baby Frap
1/4 cup Unsweetened plain almond milk
1/4 coffee
2 pinches mineral salt
1/2 tsp Vanilla Extract
1/2 tsp Caramel Extract
1 heaping tbsp Cocoa/Cacao powder
2 tbsp Pyure sweetener
8 to 10 ice cubes
1 heaping tbsp of Whey or Pea Protein

Place almond milk, coffee, salt, extracts, cocoa or cacao powder, and sweetener in a blender. Blend for 15 seconds.

Stop blender. Add ice and run blender until ice has been completely broken down. While blender is still running, add in protein and blend for 10 to 15 seconds.

Pour in a glass and enjoy.

Stay caffeinated my peeps!